At YYC Detail, we recommend investing in professional paint protection and detailing – maximizing the value of your auto investment for years to come. And with our extensive, we’ve seen an array of DIY mistakes come through our doors. We thought it’d be good to share the top car paint polishing mistakes, just to help you out.
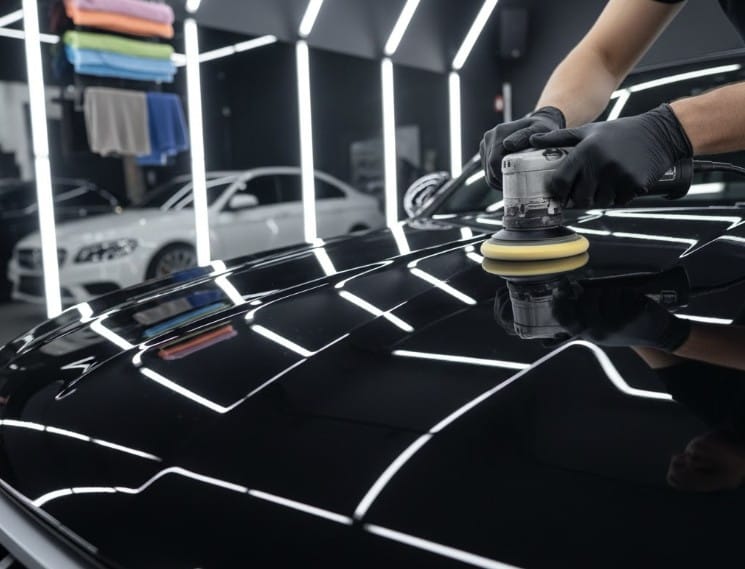
Polishing your car’s paint can transform its appearance—but only if done correctly. Many DIYers and even seasoned detailers fall into common traps that compromise the finish. Below is a curated list of the most frequent mistakes, paired with expert video tutorials to help you polish like a pro. Drawing from insights across the auto detailing community, these errors can lead to swirl marks, holograms, or even permanent damage to your clear coat. We’ll break them down step by step, incorporating tips from professionals to ensure your next detailing session yields showroom-worthy results.
Common Car Paint Polishing Mistakes Made by DIYers
- Skipping Decontamination
Failing to wash and decontaminate the paint before polishing traps dirt and debris, leading to scratches and swirl marks. Decontamination involves using clay bars or iron removers to eliminate embedded contaminants like tar or industrial fallout that a simple wash can’t handle. Experts emphasize that this step creates a smooth canvas for polishing, preventing you from grinding particles into the paint. Start with a thorough chemical and mechanical decontamination for optimal results. - Using Dirty or Wrong Buffing Pads
Dirty pads or mismatched pad types cause uneven finishes and micro-abrasions. Always clean or replace pads between uses. For instance, using a cutting pad with a finishing polish won’t deliver the desired refinement, while a dirty pad can reintroduce contaminants. Clean pads after each panel with compressed air or a dedicated pad cleaner, and match pad aggressiveness to your compound—microfiber for heavy cutting, foam for light polishing. - Overusing Polish
More isn’t better. Excess polish leads to residue buildup and dull results. Use a small, controlled amount. A pea-sized dab per section is often sufficient; overloading can cause hazing and make removal tedious. Pros recommend priming your pad lightly and adding more only if needed during the process. - Polishing in Circular Motions
Circular hand motions can create swirl marks. Use straight-line passes with a buffer for a smoother finish. Dual-action (DA) polishers are ideal for beginners as they reduce the risk of holograms from uneven pressure. Overlap your passes by 50% and keep the pad flat against the surface. - Ignoring the Pre-Wash Stage
Skipping the initial car wash allows contaminants to embed deeper during polishing. Always start with a thorough clean. This includes a two-bucket wash method to avoid recontaminating the paint. Neglecting this can turn minor imperfections into major scratches. - Using Low-Quality Compounds
Cheap or abrasive compounds can damage clear coat and reduce gloss. Invest in high-quality polish for best results. Look for products from reputable brands that specify cut levels—avoid generics that might contain fillers masking true damage. - Overworking the Paint
Over-polishing a single area can burn through the clear coat or create holograms. Work in controlled sections. Limit time per spot to 1-2 minutes and use a paint thickness gauge to monitor clear coat depth. Move methodically across panels to avoid heat buildup. - Using Too Many Products
Layering multiple products without understanding their interactions can cause hazing or residue issues. Stick to a simple system: compound for correction, polish for refinement, and wax for protection. - Beginner Technique Errors
Improper pressure or pad choice can ruin the finish. Beginners should start slow and follow proven techniques. Apply light pressure (about 5-10 lbs) and increase speed gradually on a DA polisher. - Rushing the Process
This is the importance of patience. Quick bursts or skipping steps often lead to poor results. Allocate time for test spots and multiple passes—rushing invites uneven finishes. - Unclean Paint During Polishing
Polishing over dirty paint can embed grime deeper into the surface, making correction harder. Re-wash if dust settles mid-process and work in a controlled environment.
Understanding Types of Car Waxes: Choosing the Right Protection for Your Finish
After polishing comes protection—waxing seals in that glossy shine while shielding your paint from UV rays, contaminants, and environmental damage. But not all waxes are created equal. Here’s a breakdown of the main wax types, their benefits, and when to use them, based on expert recommendations from the detailing world. This step is crucial in auto detailing to maintain your hard-earned polish.
Natural Carnauba Wax
Made from carnauba palm leaves, this wax gives a rich, “wet look” shine—especially on dark paint. Available in paste or liquid. Pros: Deep gloss, natural formula. Cons: Short lifespan (1–3 months), labor-intensive.
Synthetic Wax (Sealants)
Polymer-based sealants offer 6–12 months of protection with easy application and strong water beading. Pros: Long-lasting, UV-resistant, easy to use, Cons: Less warmth than carnauba.
Ceramic Wax
Combines wax with ceramic tech for up to 2 years of protection and high gloss. Requires proper prep. Pros: Maximum durability, slick finish, self-cleaning. Cons: Expensive, prep-intensive.
See More >> Full Guide on the Different Types of Car Wax
Why Hiring a Professional is the Best Choice for Exterior Paint Correction and Protection Services
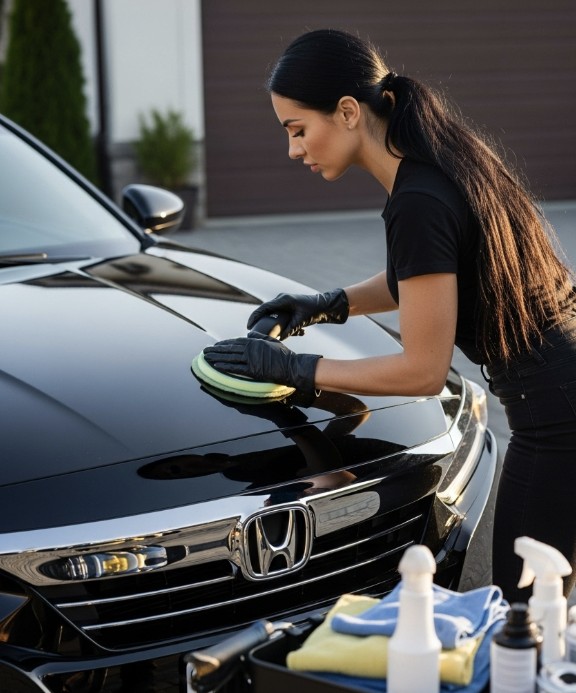
While DIY polishing can be rewarding, when it comes to serious exterior paint correction and protection, enlisting a pro often yields superior, long-lasting results. Professionals bring specialized tools, experience, and techniques that minimize risks and maximize benefits. Here’s why it’s worth the investment, backed by industry insights.
Expertise and Precision
Pros understand paint types, defect levels, and the nuances of correction—removing swirls, scratches, and oxidation without thinning the clear coat. They use paint thickness gauges and multi-stage processes that DIYers might overlook, ensuring even results. For new cars, they address transport-induced imperfections that factory finishes often hide.
Access to Professional-Grade Tools and Products
Detailers have high-end rotary or DA polishers, premium compounds, and coatings like ceramic or PPF (paint protection film) that outperform consumer options. This leads to deeper gloss and better protection against UV damage, corrosion, and contaminants.
Time Savings and Convenience
A full correction can take hours or days for amateurs, but pros handle it efficiently, often with mobile services. You avoid the learning curve and potential mistakes like over-polishing.
Enhanced Vehicle Value and Longevity
Professional work can boost resale value by 10-20% through impeccable finishes and protective layers that extend paint life. Many offer warranties, giving peace of mind against fading or defects.
Risk Reduction
DIY errors can cause holograms or burns, leading to costly repairs. Pros mitigate this with controlled environments and proven methods. For protection services like ceramic coatings, improper application voids benefits—pros ensure flawless adhesion.
Trust the Pros, Avoid Paint Polishing Mistakes
In summary, while DIY is great for maintenance, pros excel in transformative corrections and protections. Leave the heavy lifting to experts for that flawless, durable finish.
Contact Us With Any Questions You Have